シングルサインオン設定の過程では、シングルサインオンプロバイダ側での操作が必要になります。
このページでは、Okta での手順についてご説明します。
以下の手順は、シングルサインオンの設定の「4. シングルサインオンプロバイダでの作業」で行なってください。
Application の作成
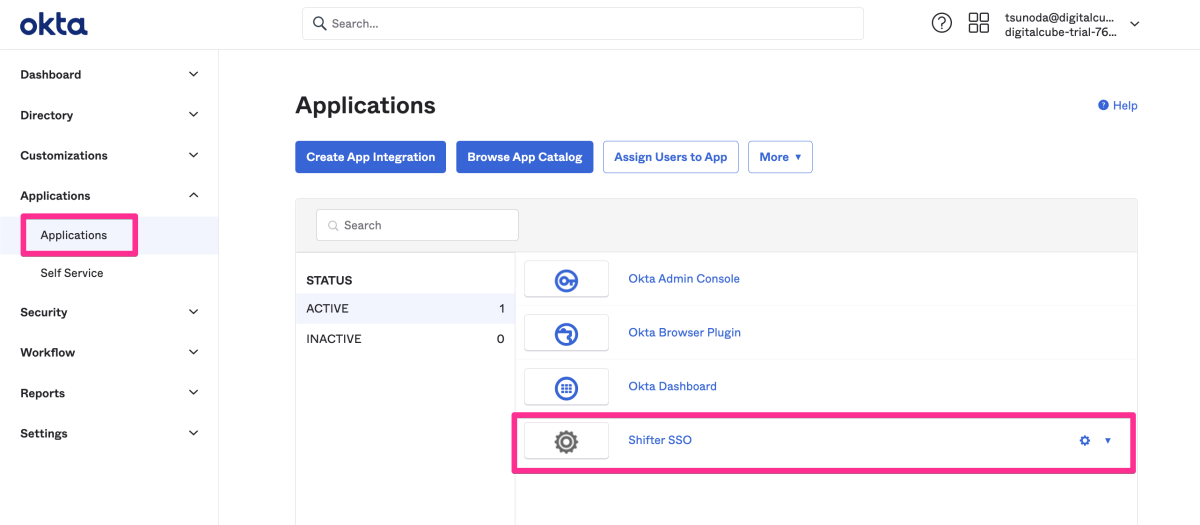
Okta の管理画面( https://www.okta.com/ )にログインします。
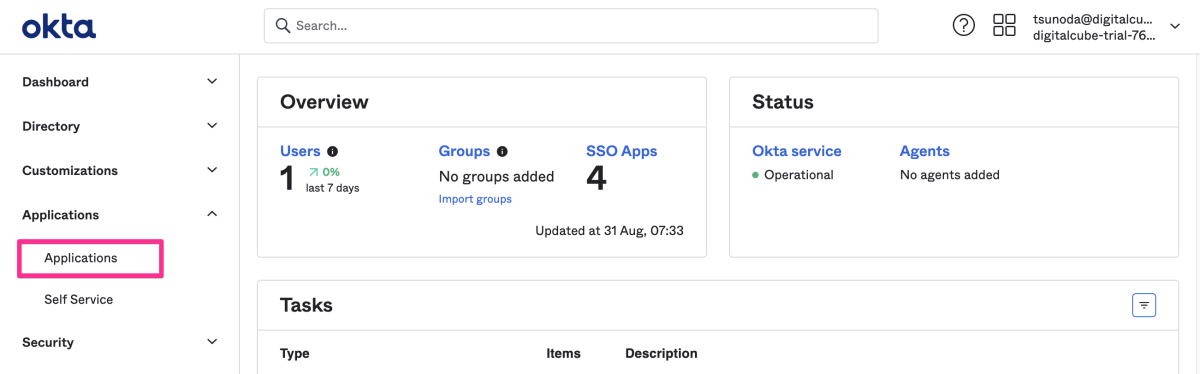
左側メニューの「 Applications 」をクリックし、さらに表示されたメニューから「 Applications 」を選択します。
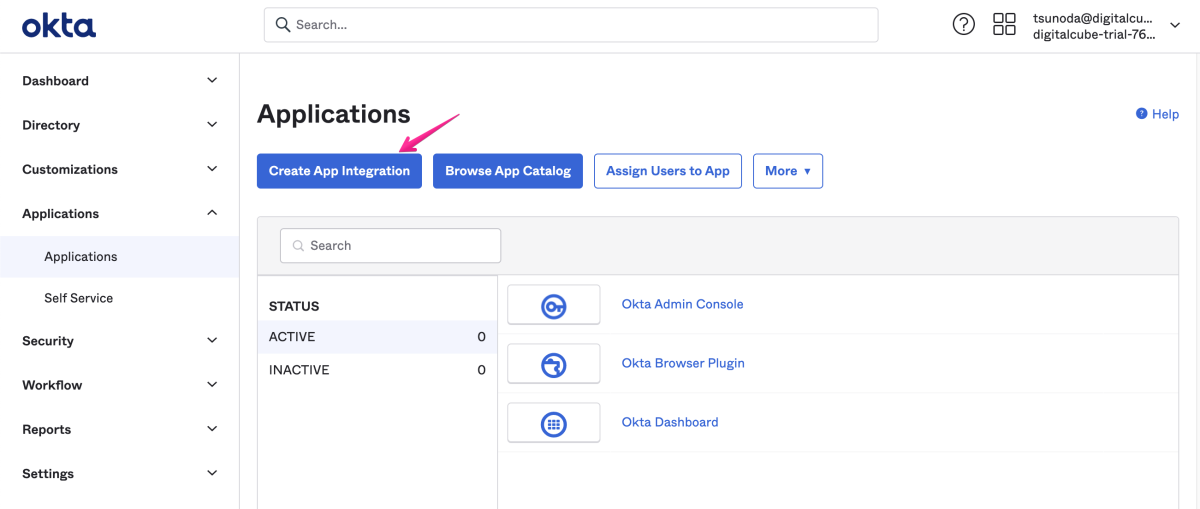
「Create App Integration」をクリックします。
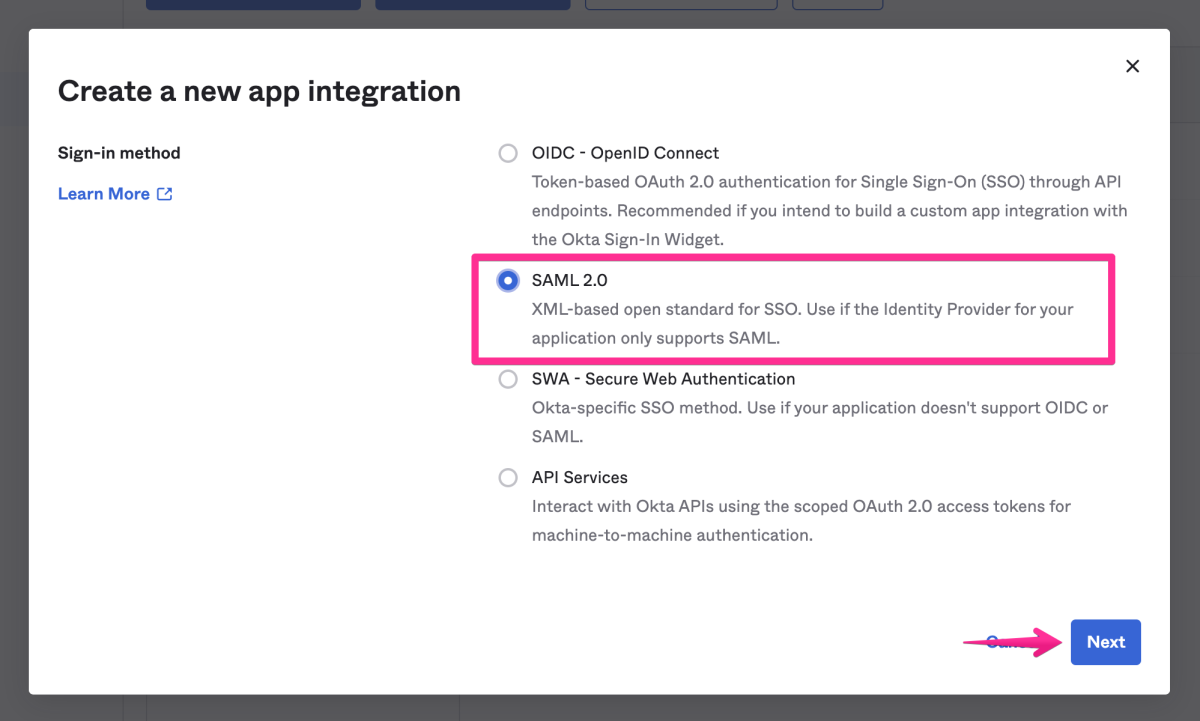
「 SAML 2.0 」を選択し、「 Next 」をクリックします。
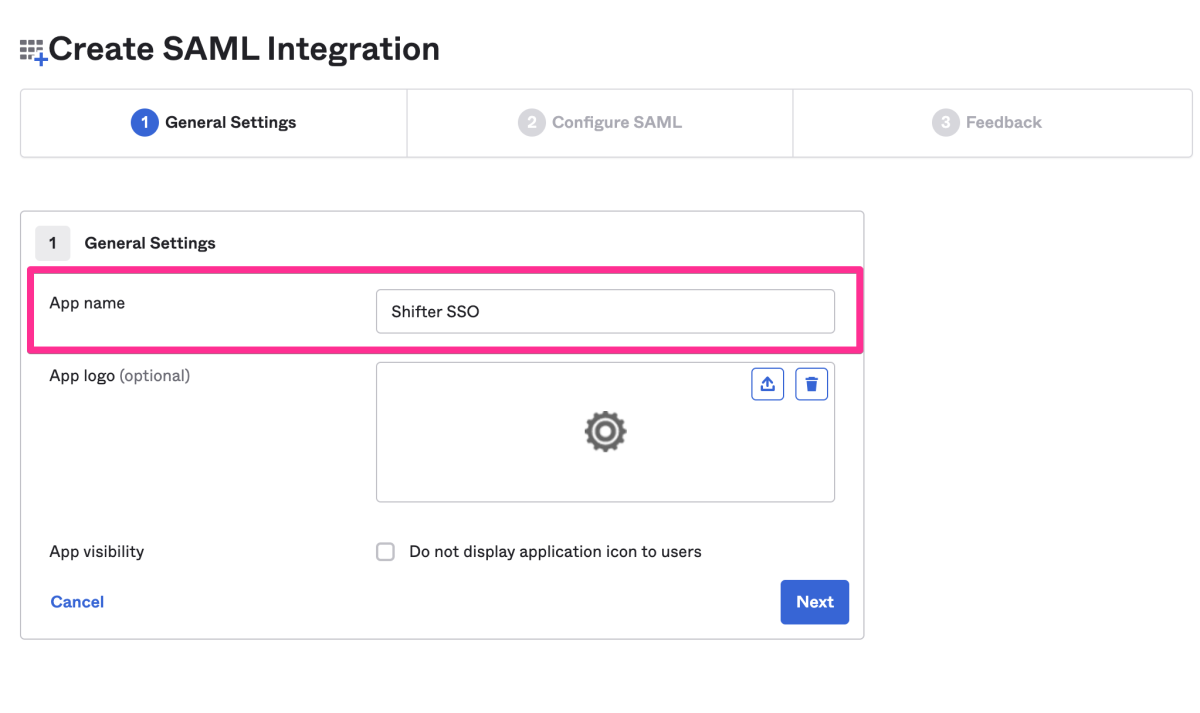
App Name に任意の名前(例:Shifter SSO )を入力し( App Visibility のチェックは任意)、右下の 「 Next 」ボタンをクリックします。
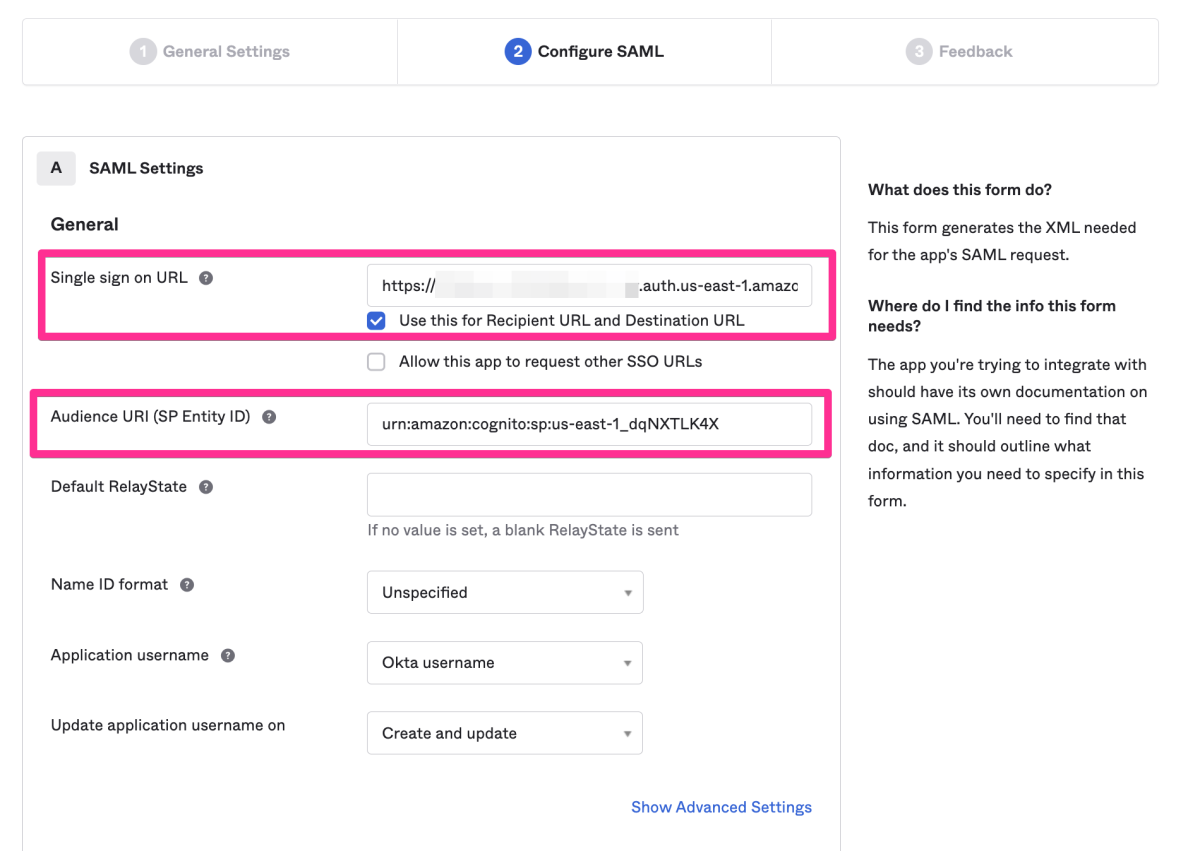
以下を参考に、A. SAML settings の General の項目を入力します。
- Single sign on URL:Shifter ダッシュボードで表示されているコールバック URL の値
- Audience URI (SP Entity ID):Shifter ダッシュボードで表示されているオーディエンス の値
- Default RelayState:空欄
- Name ID format:Persistent
- Application username:Okta username
- Update application: username on:Create and update
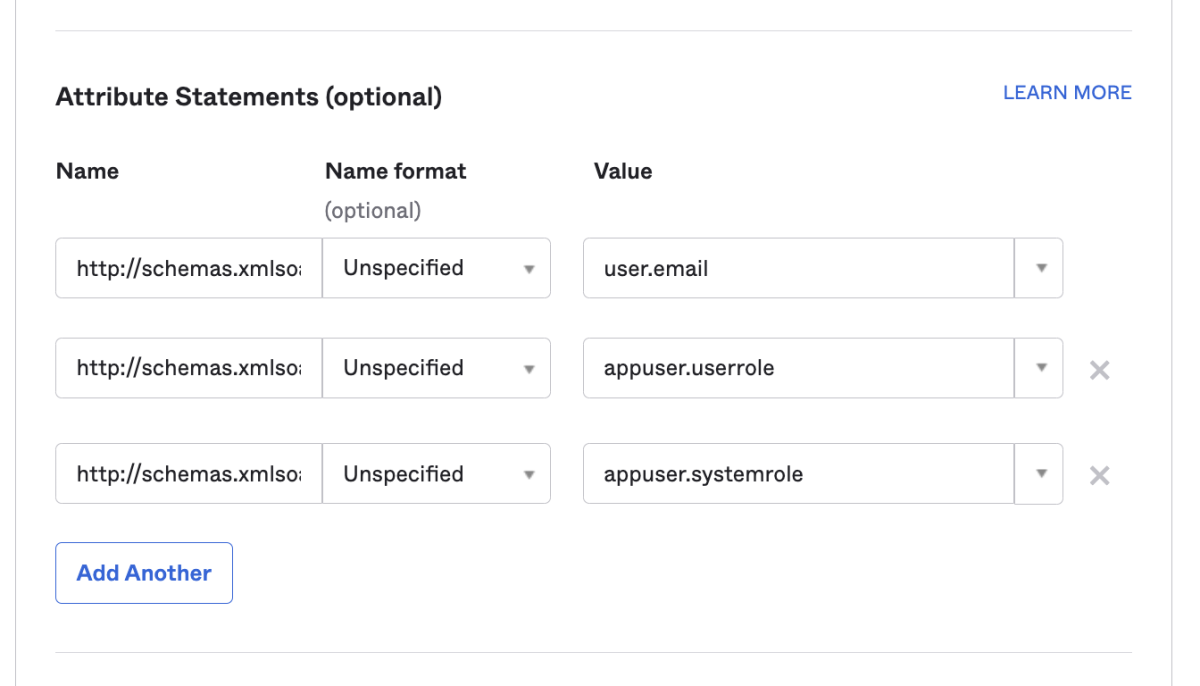
続いて、Attribute Statements (optional) の項目を以下のように設定します。
Name:http://schemas.xmlsoap.org/ws/2005/05/identity/claims/emailaddress
Name Format:Unspecified
Value:user.emailName:http://schemas.xmlsoap.org/ws/2005/05/identity/claims/userrole
Name Format:Unspecified
Value:appuser.userroleName:http://schemas.xmlsoap.org/ws/2005/05/identity/claims/systemrole
Name Format:Unspecified
Value:appuser.systemrole
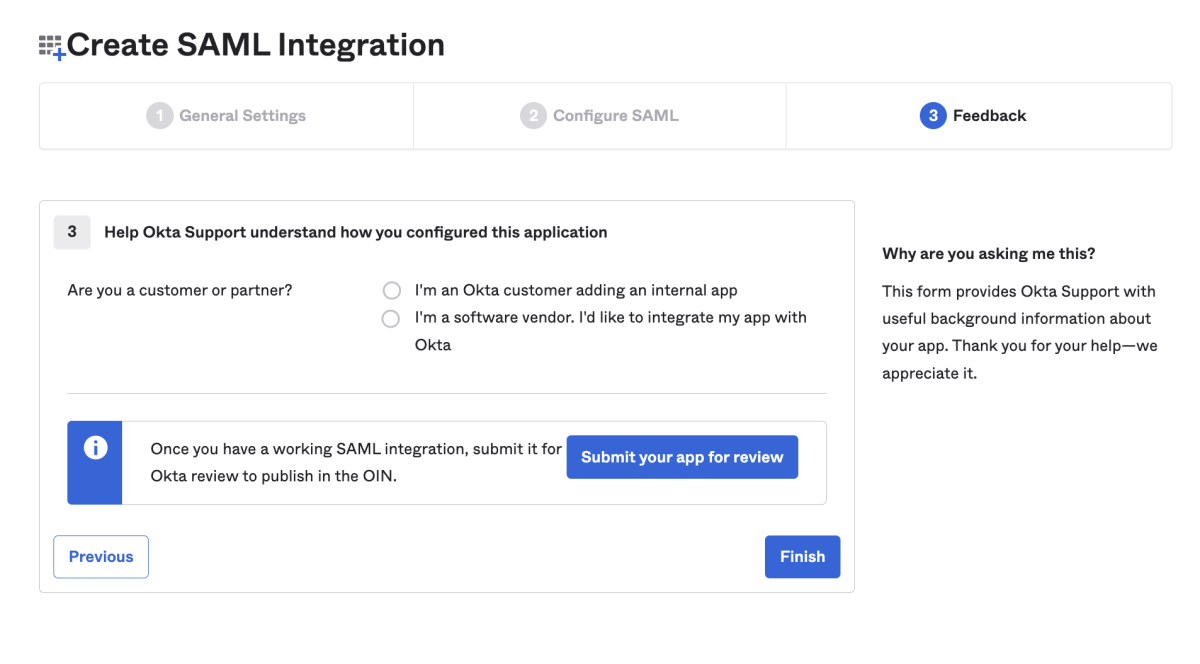
※ B. Preview the SAML assertion generated from the information above の設定は任意です。
feedback の内容を選択し、「 Finish 」をクリックします。
カスタム属性の追加
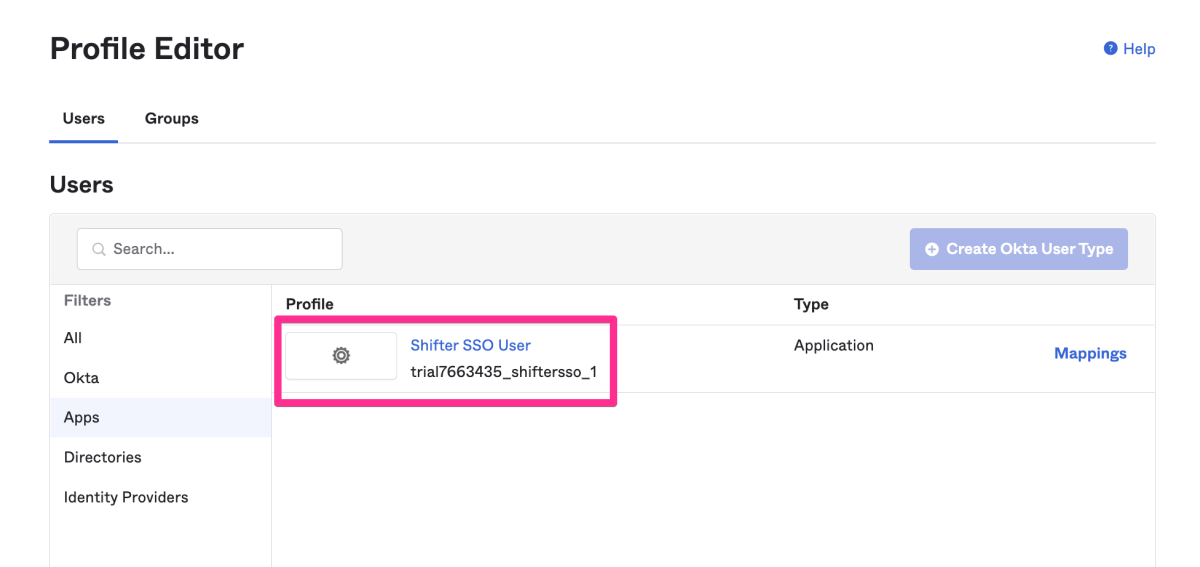
左側メニューの「 Directory 」をクリックし、さらに表示されたメニューから「 Profile Editor 」を選択します。
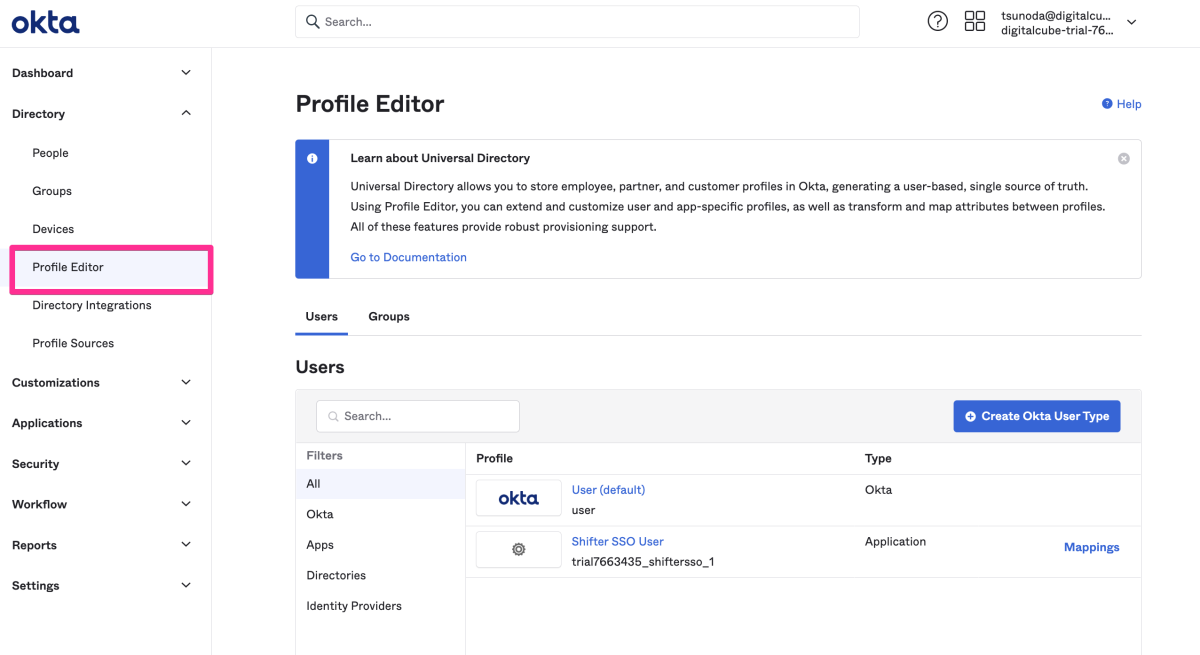
Application 名をクリックします。
「 Add Attribute 」をクリックします。
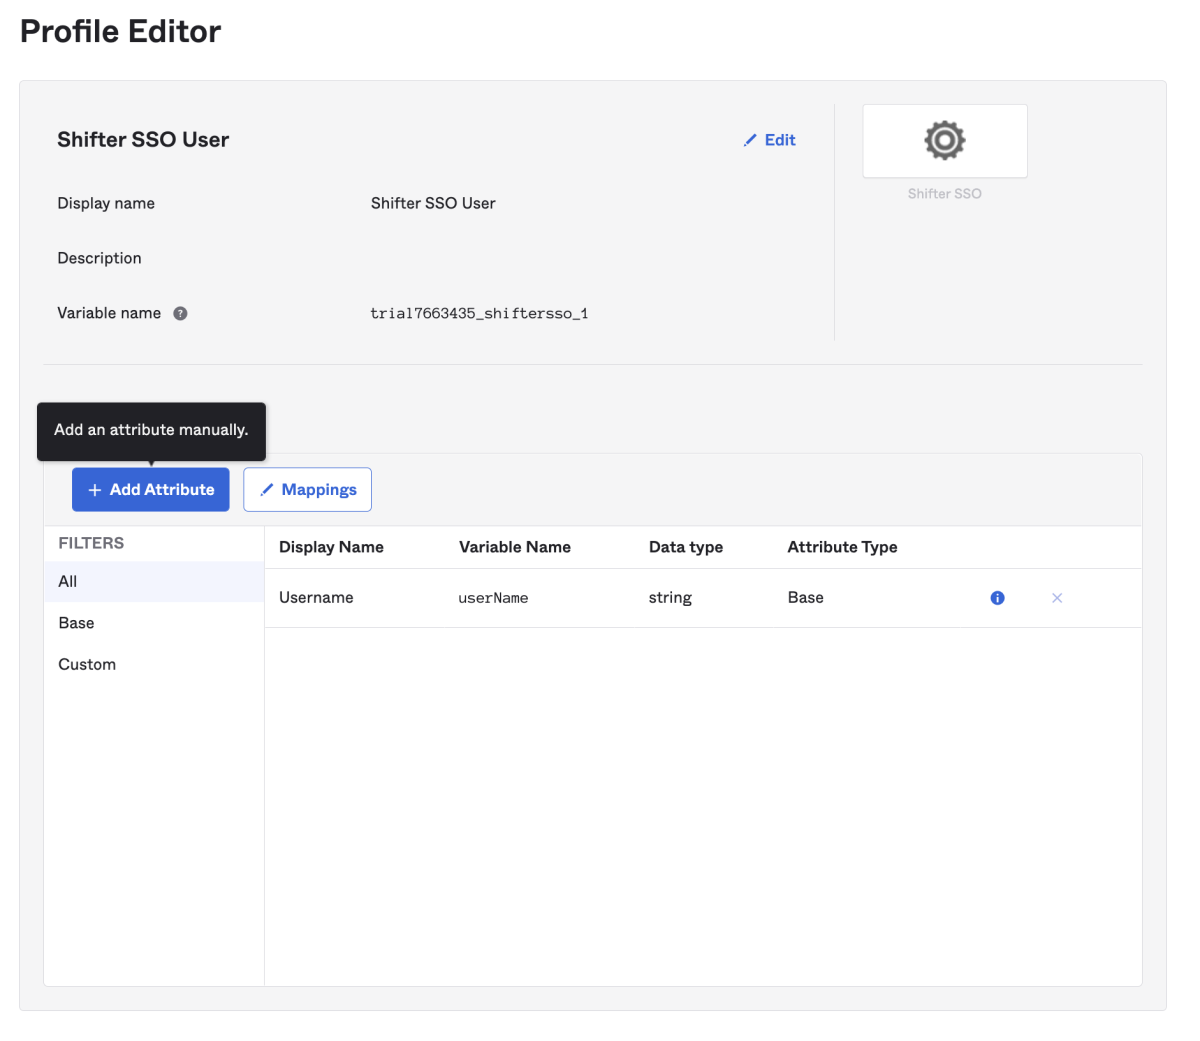
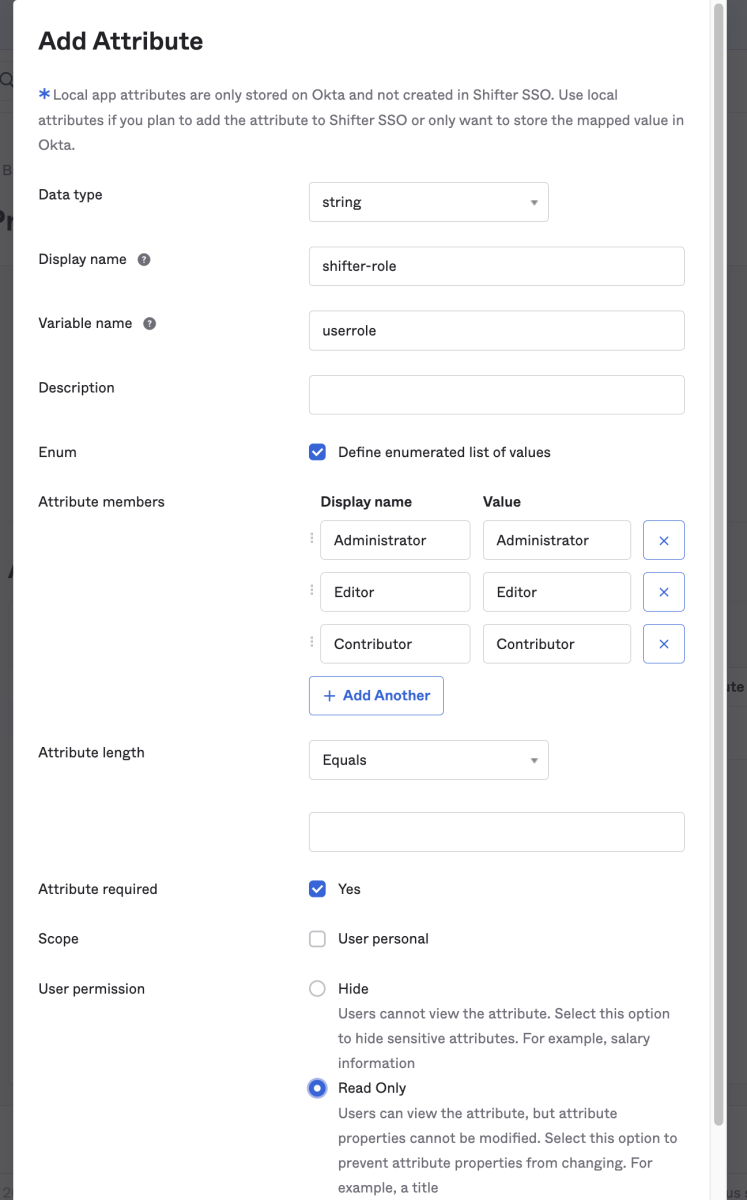
Attribute の各項目を以下のように設定、入力します。
- Data type : string
- Display name :shifter-role
- Variable name : userrole
- Enum: [✓] Define enumerated list of values
- Attribute members
- [Add Another] をクリックして以下を追加
Display name:Administrator
Value:AdministratorDisplay name:Editor
Value:EditorDisplay name:Contributor
Value:Contributor
- Attribute required:[✓] Yes
- User permission:Read Only を選択
「 Save Attribution 」をクリックして保存します。
シングルサインオンでログインさせるユーザ情報の追加
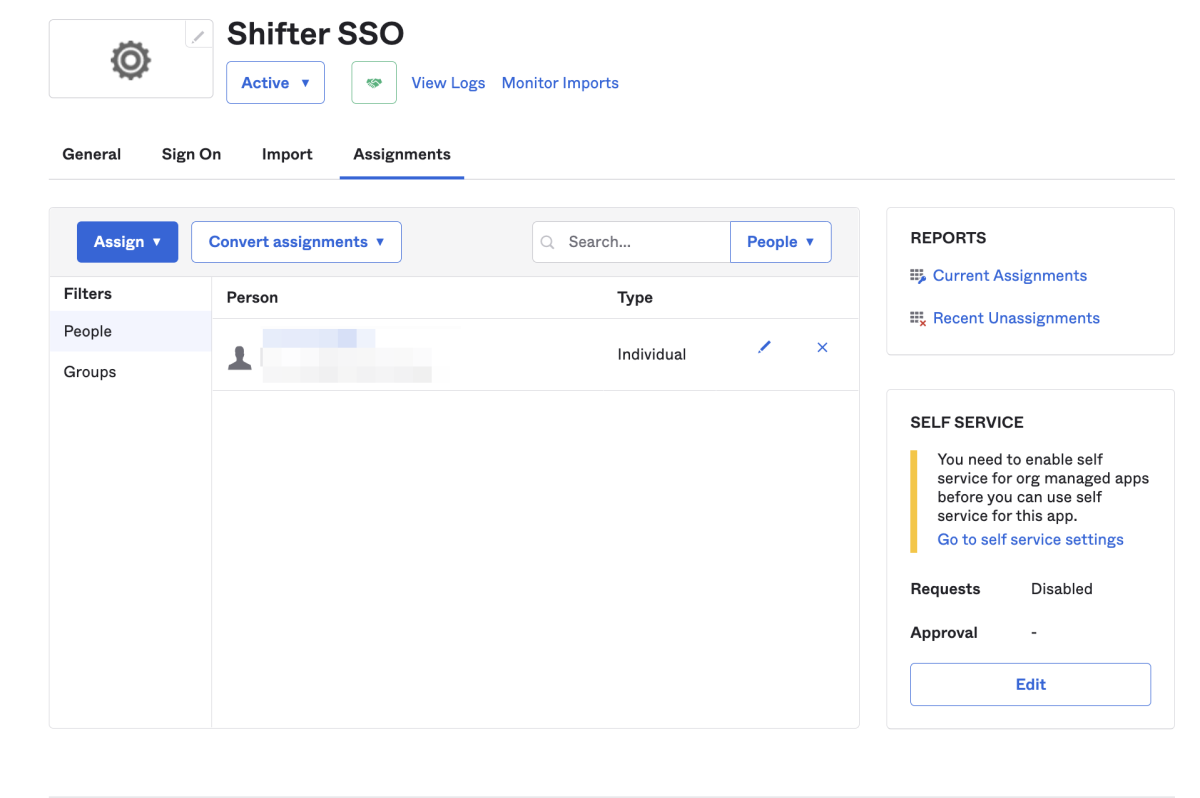
再び、「 Applications 」メニューから「 Applications 」を選択し、Application 名をクリックします。
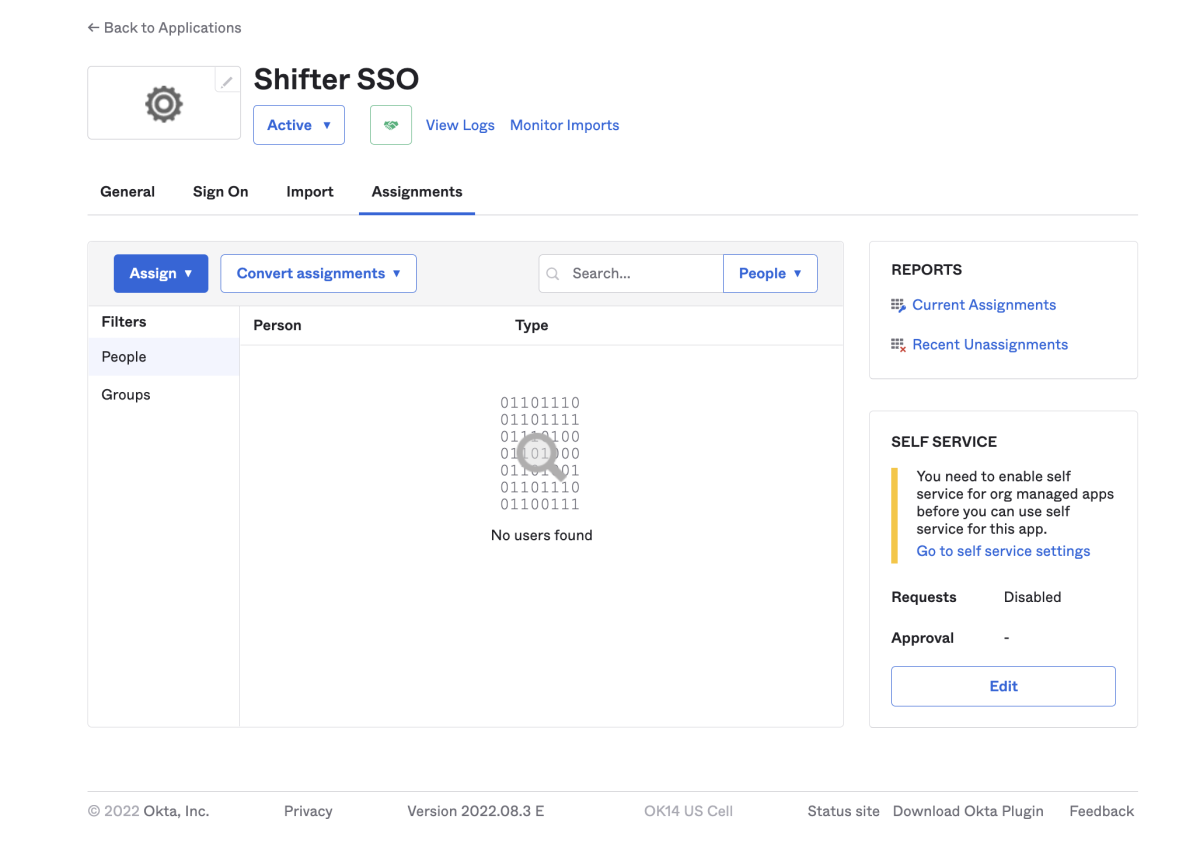
「 Assignments 」タブをクリックします。
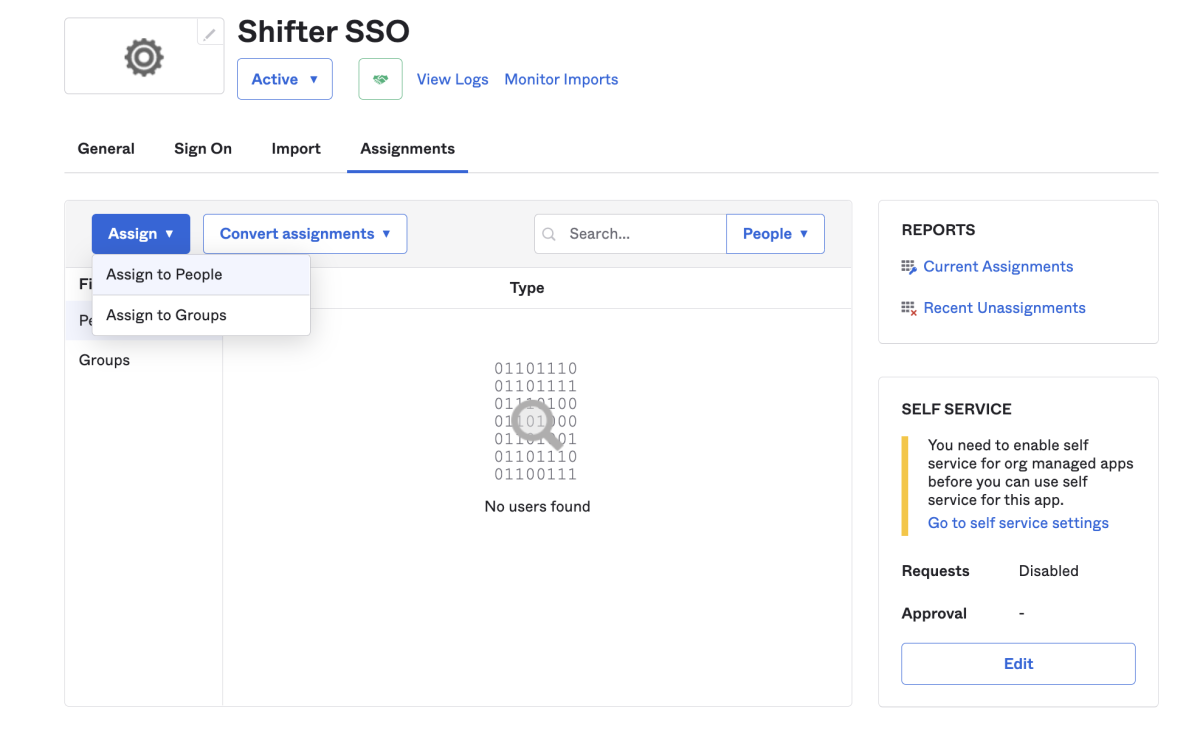
「 Assign 」のプルダウンメニューから「 Assign to People 」を選択します。
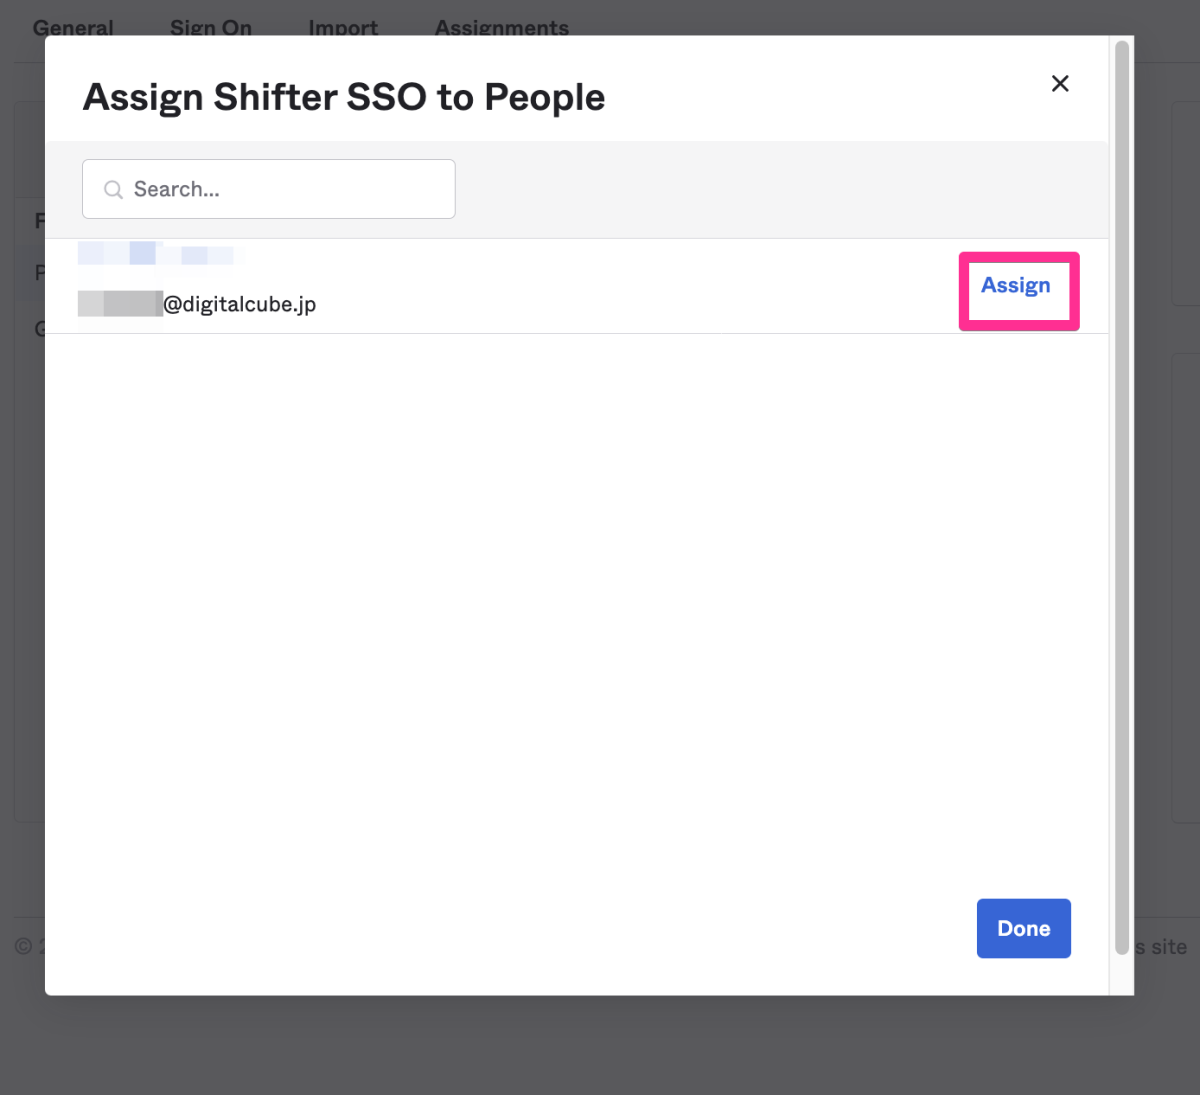
追加するユーザの「 Assign 」をクリックします。
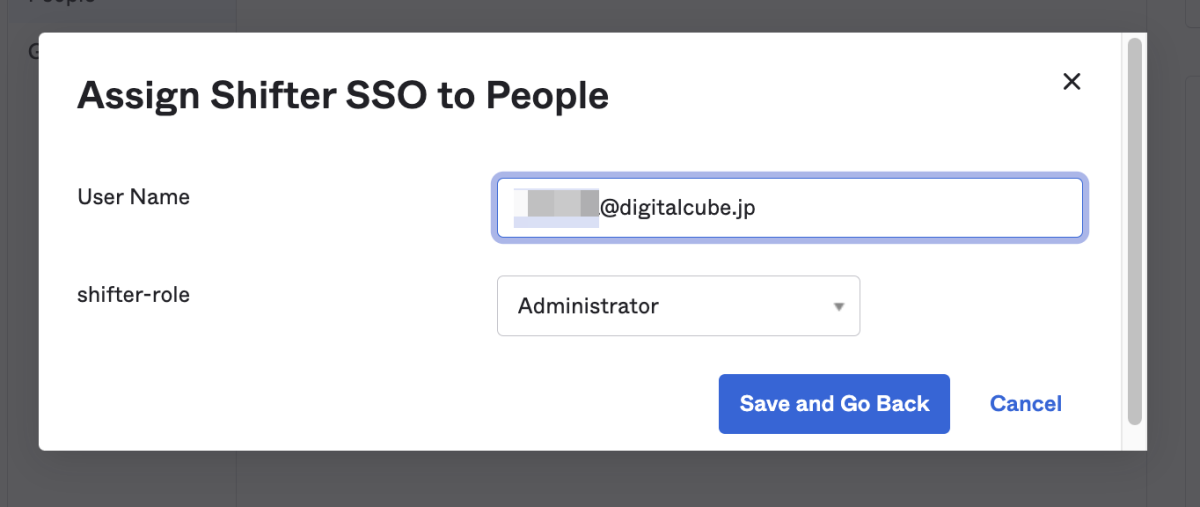
ユーザ名、 shifter-role を設定し、「 Save and Go back 」をクリックします。
右下の「 Done 」をクリックします。
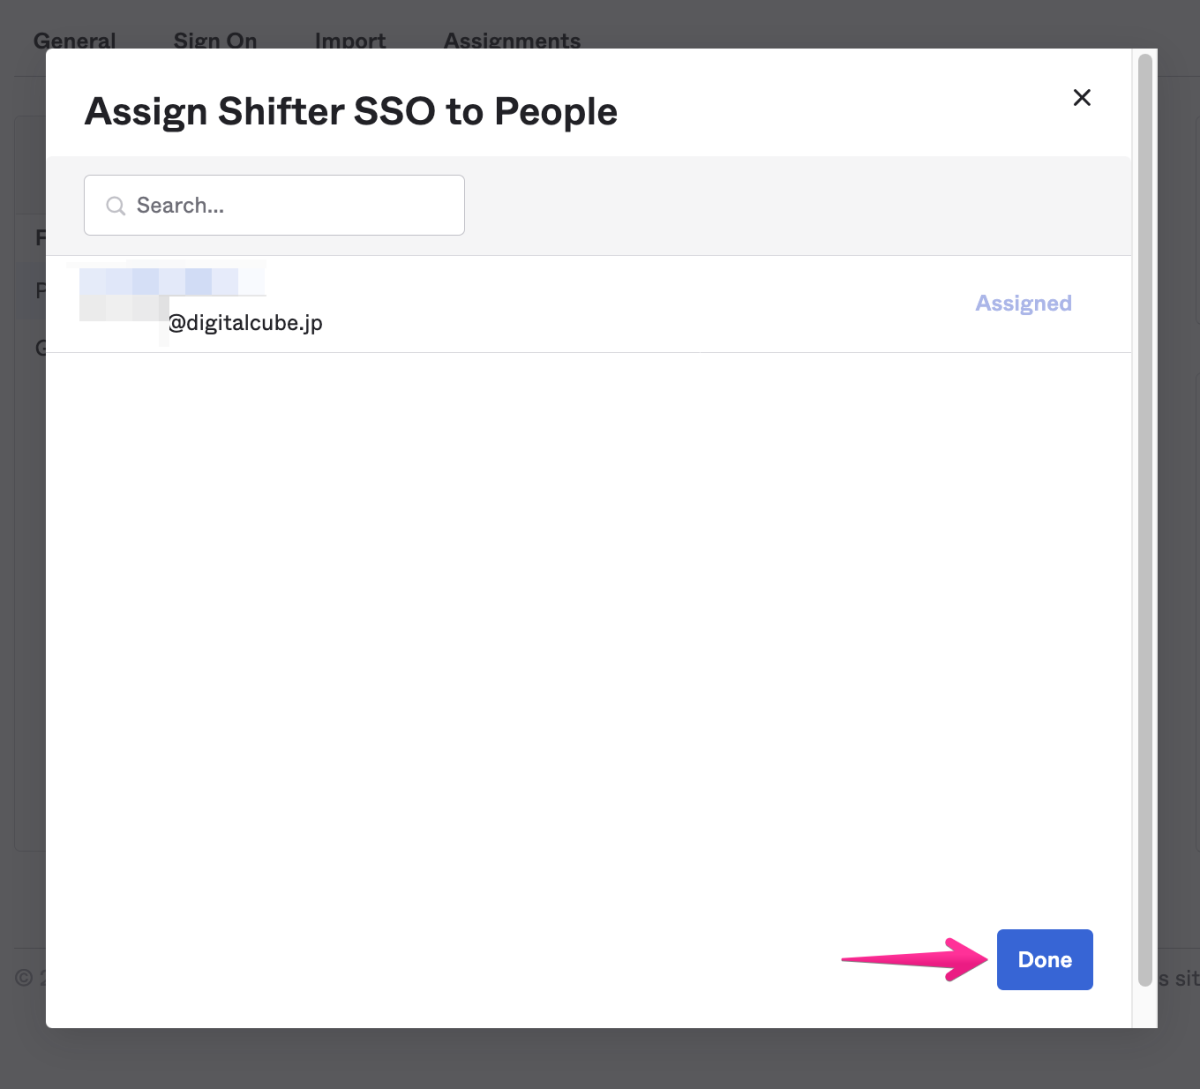
ユーザが追加されたことを、確認してください。
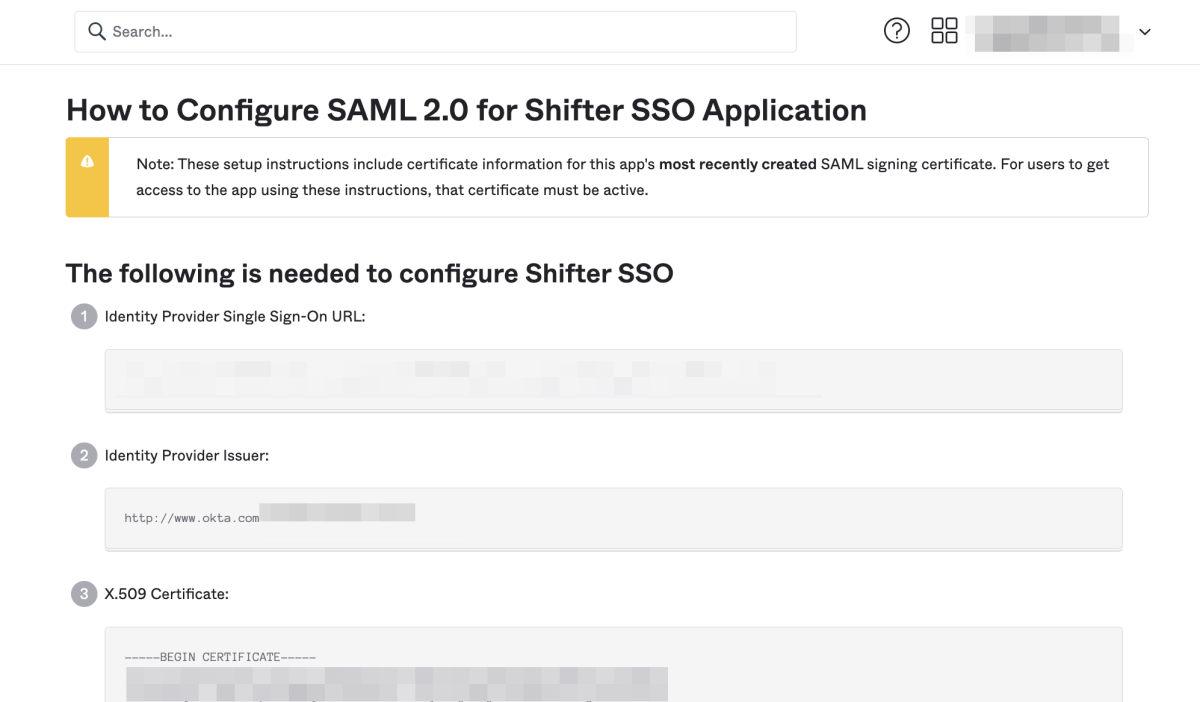
SAML setup Instruction の入手
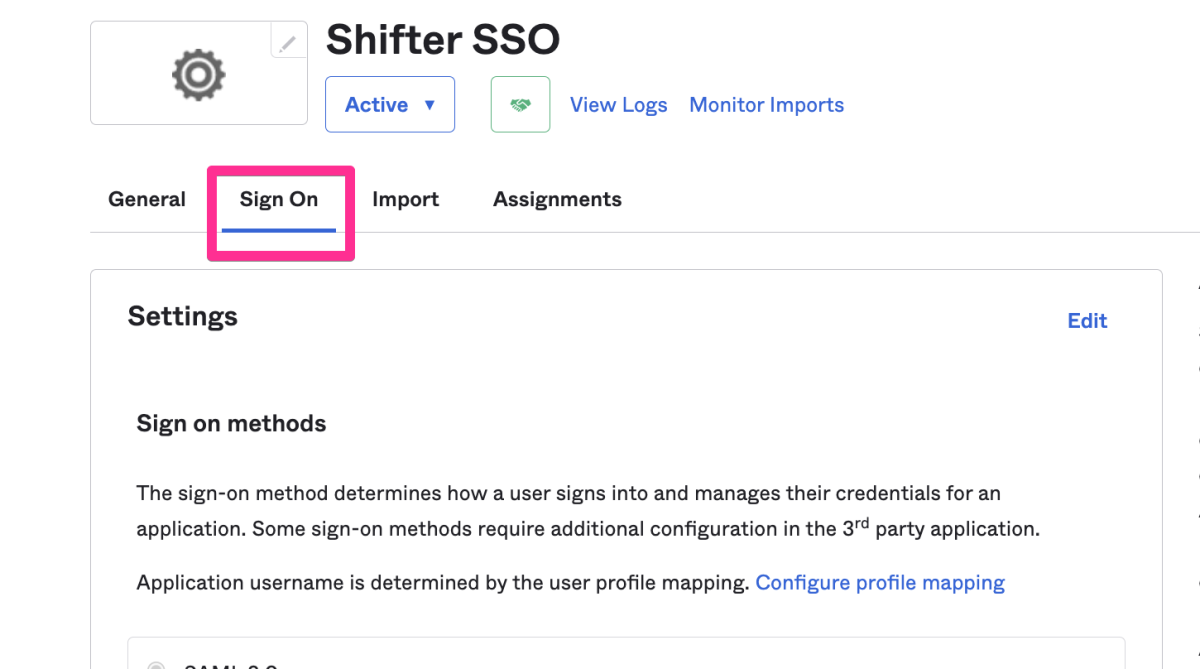
「 Sign On 」タブをクリックします。
右側にある、SAML Setup をクリックします。
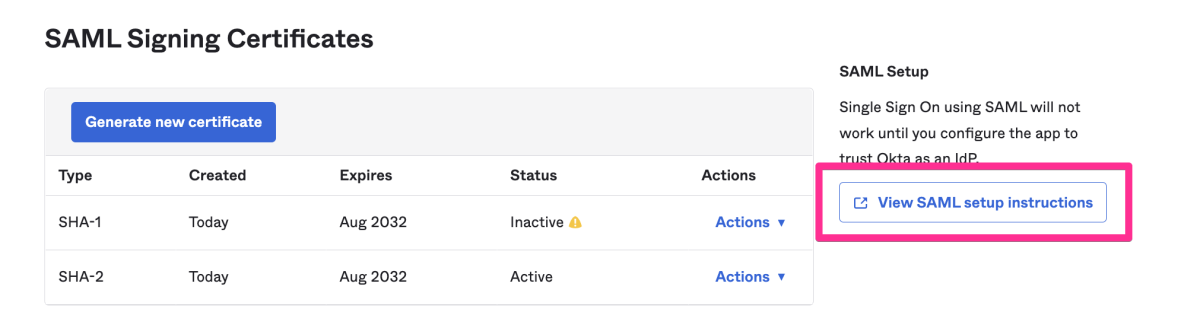
How to Configure SAML 2.0 for Shifter SSO Application ページが開きます。
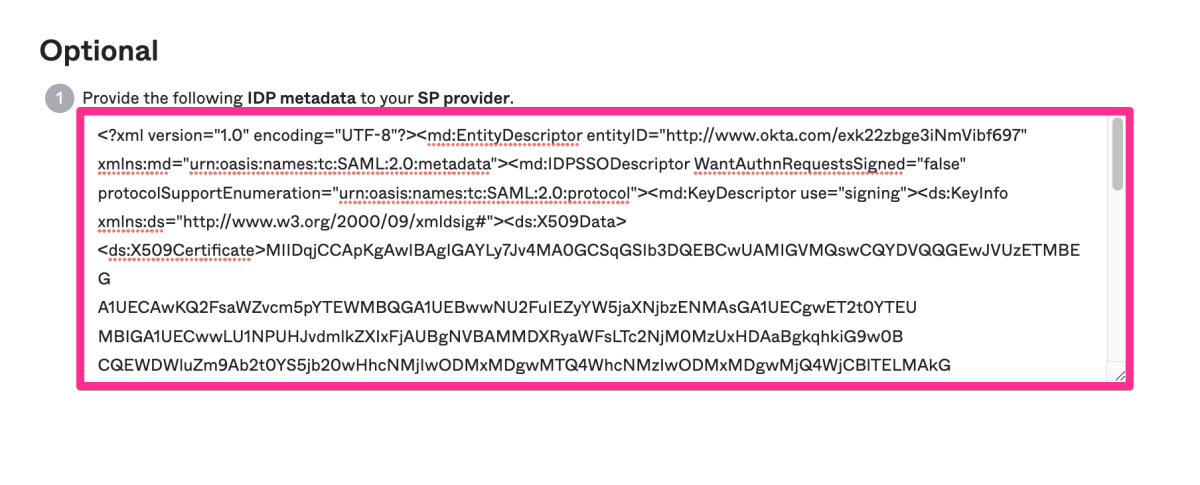
ページ最下部の「 Optional 」のテキストエリアに表示されている文字列を、コピー&ペーストして XML ファイルとして保存してください。ファイル名は任意です (例: okta-sso-shifter.xml)。
Okta 側での操作は以上です。
引き続き、シングルサインオンの設定の「5. Shifter ダッシュボードでの操作」以降の作業を行なってください。